Introduction
I’m going to get a pretty nerdy here for a moment.
So I dove in and I’m now using nvALT, Elements and Git for my note taking needs. Aside from a few minor hiccups, which I’ll address in a later post, this is really working nicely.
The one thing that I needed when I added nvALT and Elements to my note taking workflow was the ability to easily continue version control with Git. Before taking on this new process I was using Git in my notes directory and I wasn’t about to lose that option now.
But the ease which nvALT allows me to create new text files, and with nvALT built to work better with smaller files, I need some way to get my version control under control.[1]
Here’s what my workflow was:
- Work, notes, work, notes.
- Work, notes, work, notes.
- Look at the time.
- Damn! How long has it been since I last did a commit?
- cd to my notes directory.
- Commit my notes to my repository.
It wasn’t really precision based. Plus it had the added detriment of taking me out of what I was doing to commit my notes.
What I did[2] was create a Bash script and then used Automator to create a Service for it that I also applied a keyboard shortcut to.
If you’re still with me, here’s how I did it:
The Reveal
First[3], create your Bash script.
I keep all my notes in one directory. This is the way that nvALT and, it seems, Elements like to work. With some light taxonomy (ala Merlin Mann and Mac Power Users) I have a reasonably good system in place. All my notes are in a Dropbox subdirectory called “notes.”
To get this to work I created a Bash script named git_notes.sh and put
this in it:
#!/bin/bash

cd /Users/username/Dropbox/notes/
git add .
git commit -m 'nvALT Service Commit'
echo "* "`date`" nvALT Commit" >> /Users/username/Dropbox/notes/noteCommits`date "+%Y%m%d"`.md
Now, you’ll see that this is redundant and probably a lot silly, but this is what it does.
- It makes sure that we’r in my notes directory using the absolute pathname.
- It stages only the modified files to the repository.[4]
- It commits those changes and uses a standard message for my Git log file.
- The last line is where it gets a little silly, it appends to another file in the same Dropbox subdirectory with a message that also gives a human readable date/time. Why am I doing this? I don’t know, maybe someday I’ll set up something to parse it to get some analytics of when I do most of my commits for my notes file.
But now that we have our Bash script. The rest is trivial.
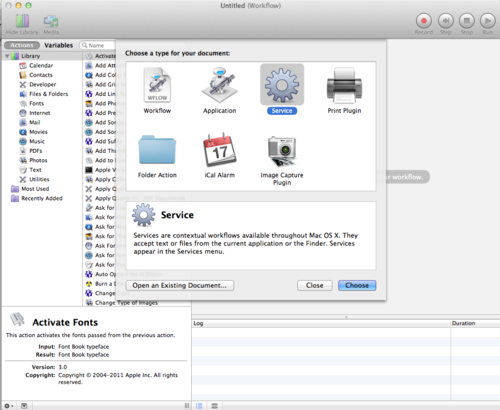
First, we open Automator and select “Service” as our document type under the “Choose a type for your document:”
Next, we’re going to change the “Service receives” from the default “text” to “no input”. Leave the “in” “any application” as it is.
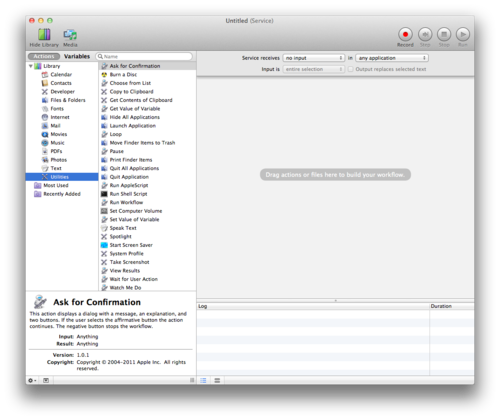
Penultimately, we click “Utilities” under the left-side “Library” dropdown and then drag the “Run Shell Script” from the middle column over to the right side.
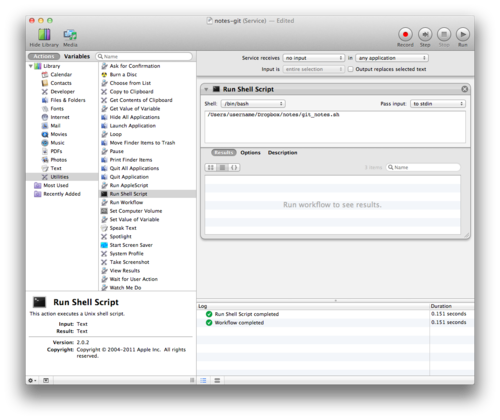
Lastly, we enter in the location of the script in the workflow. It’s a
good idea to use the absolute pathname here. In my case it was
/Users/username/Dropbox/notes/git_notes.sh.
Once you save you’ll have a Service that will be available from any of your application menus. Click on the Service and it will do a Git commit of all the changes to that notes directory as well as update the faux log file we’ve created for the day.
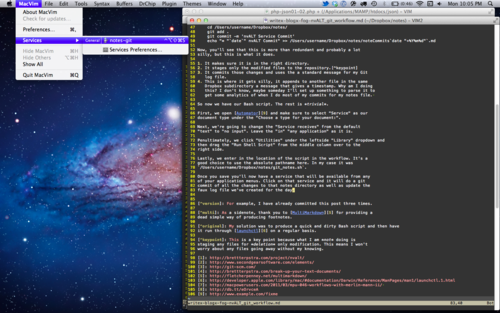
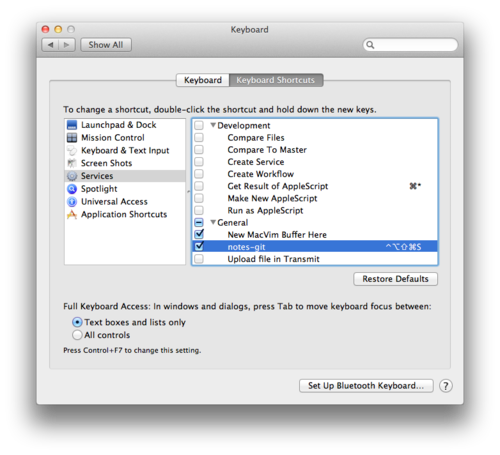
But I don’t like to use the mouse/trackpad that much. So the final touch
to this is to create a keyboard shortcut in your System Preferences. Go
to Applications > System Preferences > Keyboard. Then choose “Keyboard
Shortcuts” and select “Services” from the left side. Your new Service
should be at the end of the Services listings. Just click the blank
space at the far end of the window and you should get a text input
field. You can use anything you want for your shortcut, but I chose
control-option-command-shift-s for mine to avoid any chance of a
keyboard conflict.
Conclusion
So there you have it. A quick and dirty way to make sure that the notes you’re producing will be version controlled through Git. As a final remark, I’ll say that having version control has already paid off for me.
I use multiple computers and I made the huge mistake of accidentally
deleting a bunch of files when a prompt popped up and I didn’t read
exactly what it said. All of a sudden 20-some-odd notes of mine were
gone. But version control to the rescue! I knew I had just committed
to my repo before I had deleted the files and I was able to pull them
back from brink of deletion hell. But this was even easier than it could
have been because I had been using git add . instead of git add -a.
All it meant was that I needed to unstage the deleted files. It was
great and a perfect reason why doing something like this makes sense.
Post Script
I should add that the use of a common/standard commit message is bad practice. The reason I do this, instead of throwing a prompt so that I can enter in a more detailed message, is that this is supposed to create a workflow that won’t interrupt what you’re in the middle of but give you the peace of mind that you’ve got things in a version controlled environment. This does not prevent you from going to your notes directory and doing a proper Git commit with a detailed message on what you’ve done since your last commit. In fact, at the end of this paragraph I’ll be committing properly to say that this draft is finished. And when I finish my review of the draft I’ll commit again, and message that it is ready for posting. After that, I’ll probably do a name change to the file (this is the taxonomy thing I mentioned before) and then do another proper commit.
One last point: You may have noticed that you can easily change the Bash
script to point to any directory you want. Once you have the Service in
place, you can edit your .sh file whenever you please and have a
temporary keyboard shortcut for Git repo commits. I think that’s kinda
cool.
-
For example, I have already committed this post three times. ↩
-
My solution was to produce a quick and dirty Bash script and then have it run through launchctl on a regular basis. ↩
-
This tutorial assumes you have a local Git repo in place. If you don’t have one and want to learn how, you can check out my post on the subject of Git. ↩
-
This is a key point because what I am not doing is staging any files for deletion only modification. This means I won’t worry about any files going away without my knowing. ↩
I originally posted this tutorial on my Tumblr: The Face of Geoff